One of the facilities provided by the feed bloggers are taking the data with sorting index number of comments. Not difficult to apply in your blogger widget. Well in this article we will explain in detail How to
Create mostComment Widget independently.
JSON script mostComment
Scripts provided by feed bloggers to take the index data is very simple, you can write the script with the following format:
http://[YOUR_HOMEPAGE]/feeds/posts/default?max-results=9999&orderby=published&alt=json-in-script&callback=mostComment
The index data can be retrieved using the javascript coding as the following example:
<script src="http://[YOUR_HOMEPAGE/feeds/posts/default?max-results=9999&orderby=published&alt=json-in-script&callback=mostComment"></script>
How to Apply mostComment in JavaScript
To apply mostComment Blogger Widget, I will use a technique by placing the HTML tag
<ul> and
<li>. Quite simply you can see the
HTML and Javascript code like the example below:
<div id="most-comments"></div>

<script type='text/javascript'>
//<![CDATA[
var numPosts = 10;
var homePage = "senatechno.com";
var postTitlear = new Array();
var postUrlar = new Array();
var postCommentar = new Array();
var totalpost;
document.write('<div id="most-comments"><ul>');

function mostComment(j) {
    var a = j.feed.entry.length;
    totalpost = a;
    for (var f = 0; f < a; f++) {
        var h = j.feed.entry[f];
        var c = h.title.$t;
        var b;
        var g;
        if (f == j.feed.entry.length) {
            break
        }
        for (var d = 0; d < h.link.length; d++) {
            if (h.link[d].rel == "alternate") {
                g = h.link[d].href;
                break
            }
        }
        for (var d = 0; d < h.link.length; d++) {
            if (h.link[d].rel == "replies" && h.link[d].type == "text/html") {
                b = h.link[d].title.split(" ")[0];
            }
        };
        postTitlear.push(c);
        postUrlar.push(g);
        postCommentar.push(b)
    }
    sortPosts();
    for (var f = 0; f < numPosts; f++) {
        var e = '<li><span class="count-most">' + postCommentar[f] + '</span><a href="' + postUrlar[f] + '" title="' + postTitlear[f]

+ '" target="_blank">' + postTitlear[f] + '</a>';
        document.write(e)
    }
}

function sortPosts() {
    function c(d, f) {
        var e = postTitlear[d];
        postTitlear[d] = postTitlear[f];
        postTitlear[f] = e;
        var e = postUrlar[d];
        postUrlar[d] = postUrlar[f];
        postUrlar[f] = e;
        var e = postCommentar[d];
        postCommentar[d] = postCommentar[f];
        postCommentar[f] = e
    }
    for (var b = 0; b < postTitlear.length - 1; b++) {
        for (var a = b + 1; a < postTitlear.length; a++) {
            if (parseInt(postCommentar[b]) < parseInt(postCommentar[a])) {
                c(b, a)
            }
        }
    }
}
document.write('<script src="http://' + homePage + '/feeds/posts/default?max-results=9999&orderby=published&alt=json-in-script&callback=mostComment"><\/script>');
document.write('</li>')
document.write('</ul>')
document.write('</div>');
//]]>
</script>
In the example above, I use the class name "
most-comments" which I put in the HTML tag
<div>, so it is quite easy also you will use it in Blogger widget.
Perform the standard way; from the
Blogger Dashboard go to the
Layout menu, then select the
Add a Gadget in accordance with the position you want. Then select the type of
HTML/JavaScript gadget and copy-paste the above code into the
Content, change
senatechno.com with your url blog and then save and see the results.
Easy enough right?Decoration Widget mostComment
To provide the decoration of
mostComment Widget make it more beautiful, you can can add
CSS Style code such as the following example below:
<div id="most-comments"></div>

<style scoped='' type='text/css'>
#most-comments li,#most-comments ul,#most-comments ul li {
  margin: 0;
  padding: 0;
  list-style: none;
  color: #444;
  font-family: 'Open Sans',Helvetica,Arial,sans-serif;
  font-size: 14px;
}

#most-comments ul li {
  position: relative;
  overflow: hidden;
  background: #fff;
  margin: 3.5px 0;
  padding: 7px 10px 7px 50px;
  white-space: nowrap;
  text-overflow: ellipsis;
  box-shadow: inset 0 0 #fc4f3f;
  border: 1px solid #e6e6e6;
  transition: all .6s;
}

#most-comments ul li:hover {
  box-shadow: inset 310px 0 #fc4f3f;
}

#most-comments ul li a {
  color: #444;
  font-weight: 700;
  text-decoration: none;
  transition: all .3s;
}

#most-comments ul li a:hover,#most-comments ul li:hover a {
  color: #fff;
}

.count-most {
  position: absolute;
  left: 0;
  top: 0;
  width: 40px;
  height: 100%;
  margin: 0;
  padding: 7px 0;
  background-color: #383838;
  color: #fff!important;
  text-align: center;
  transition: all .3s;
}

#most-comments ul li:hover .count-most {
  background-color: #fc4f3f;
}
</style>

<script type='text/javascript'>
//<![CDATA[
var numPosts = 10;
var homePage = "senatechno.com";
var postTitlear = new Array();
var postUrlar = new Array();
var postCommentar = new Array();
var totalpost;
document.write('<div id="most-comments"><ul>');

function mostComment(j) {
    var a = j.feed.entry.length;
    totalpost = a;
    for (var f = 0; f < a; f++) {
        var h = j.feed.entry[f];
        var c = h.title.$t;
        var b;
        var g;
        if (f == j.feed.entry.length) {
            break
        }
        for (var d = 0; d < h.link.length; d++) {
            if (h.link[d].rel == "alternate") {
                g = h.link[d].href;
                break
            }
        }
        for (var d = 0; d < h.link.length; d++) {
            if (h.link[d].rel == "replies" && h.link[d].type == "text/html") {
                b = h.link[d].title.split(" ")[0];
            }
        };
        postTitlear.push(c);
        postUrlar.push(g);
        postCommentar.push(b)
    }
    sortPosts();
    for (var f = 0; f < numPosts; f++) {
        var e = '<li><span class="count-most">' + postCommentar[f] + '</span><a href="' + postUrlar[f] + '" title="' + postTitlear[f]

+ '" target="_blank">' + postTitlear[f] + '</a>';
        document.write(e)
    }
}

function sortPosts() {
    function c(d, f) {
        var e = postTitlear[d];
        postTitlear[d] = postTitlear[f];
        postTitlear[f] = e;
        var e = postUrlar[d];
        postUrlar[d] = postUrlar[f];
        postUrlar[f] = e;
        var e = postCommentar[d];
        postCommentar[d] = postCommentar[f];
        postCommentar[f] = e
    }
    for (var b = 0; b < postTitlear.length - 1; b++) {
        for (var a = b + 1; a < postTitlear.length; a++) {
            if (parseInt(postCommentar[b]) < parseInt(postCommentar[a])) {
                c(b, a)
            }
        }
    }
}
document.write('<script src="http://' + homePage + '/feeds/posts/default?max-results=9999&orderby=published&alt=json-in-script&callback=mostComment"><\/script>');
document.write('</li>')
document.write('</ul>')
document.write('</div>');
//]]>
</script>
You can see a demo like the following example:
mostComment Widget is one of
Blogging Tricks very helpful increasing your web traffic, as it will attract readers to look beyond the articles interesting with lots of comments.

 Adobe After Effects is a digital visual effects, motion graphics, and compositing application developed by Adobe. After Effects can be used for keying, tracking, rotoscoping, compositing and animation. It also functions as a very basic non-linear editor, audio editor and media transcoder. If you're an animator or video editor who like CGI-scene you must have this one because this is very amazing software. You can animate, edit, create motion graphic and compose media on 2D or 3D.
 TechPowerUp reported on Saturday (6/2/2016), Apacer just released a brand new DDR4-3300 Blade Fire 32gb memory. BLADE FIRE DDR4 with heartbeat LED, perfectly for gaming, overclocking, and M.O.D enthusiasts. The fastest memory kit available is clocked at 3200 MHz and BLADE FIRE kits are ranged in four different clock speeds from 2400 MHz 1.2V to 3200 MHz 1.35V with 16-16-18-38. BLADE FIRE is available in 4 GB, 8 GB, and 16 GB capacities in dual-module package and comes equipped with total capacity of 32 GB (16 GB x2). The XMP 2.0 support for simple overclocking setup delivers instant top-level performance for motherboards with Intel's 100 Series. Not only low latency for outstanding DDR4 performance but also lower power consumption with less heat and higher reliability provides users the fastest speeds and the highest stability when it comes to gaming and overclocking. With a stylish design of LED light saber on motherboard, the black heat spreader is made from quality aluminum material with matte finish. The metallic silver saber in the middle shows an aggressive look of a gaming memory module.
  Now it often happens hijacking Facebook accounts; it happens not only because of cleverness of pirates, but sometimes because of your lack of attention to the security of your Facebook account.
  Based on my experience, the problems in SQL Server database with a very large amount of data (Hugh Data), retrieval of data using the Stored Procedure with parameters will cause new problems, namely on the side of speed performance; This is because it is not done in a proper way of using the available elements; let's try to prove it!
  It's easy if you want to add the widget to translate your website, so that your website is formed as a multi-language website. For setting up is easy, because Google has been providing translation widget which can be installed in all types of websites.


 In Windows 10 if you are going to create a new local user account, it should be done by the script. Unlike in previous versions to do with the User Interface more easily, unless you use your registered email within Microsoft account.


 In WhatsApp application available at facility to send images, video and audio. However, due to limitations of Internal Memory, SD Card, or because you do not want to download a images, video or audio, it is not convenient if WhatsApp will automatically download and store images, video or audio into memory of your gadget.


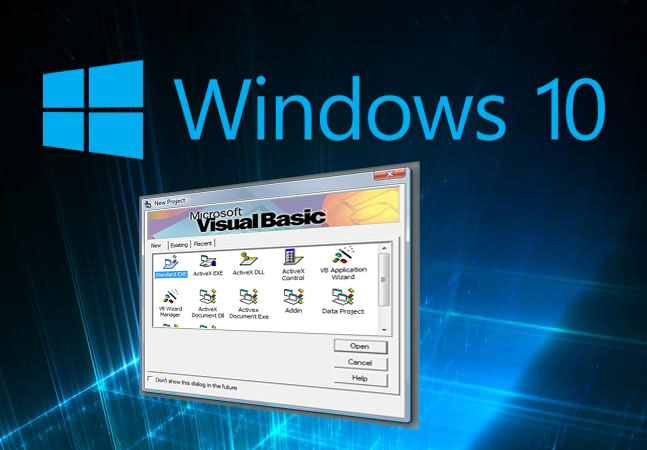 Visual Basic 6 is a legend for programming languages that are phenomenal at the time. Visual Basic 6 is the last version developed before updating its discontinued and replaced with Visual Basic[dot]Net.
 .
. 
 As in the previous versions, Windows 10 also has a service that serves to check and update or renewal of components released by Microsoft. As you know the service is Windows Update.


 YouTube is a video site that is very well known throughout the internet users. With this site you can see and watch videos from around the world that have been posted by various internet users from around the world.

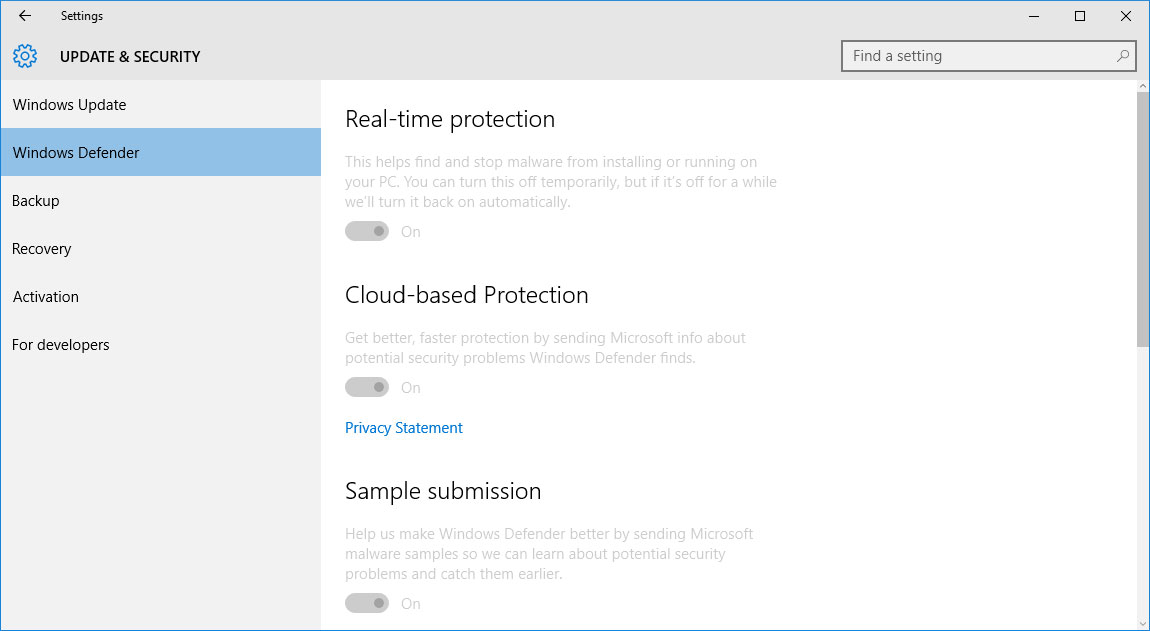
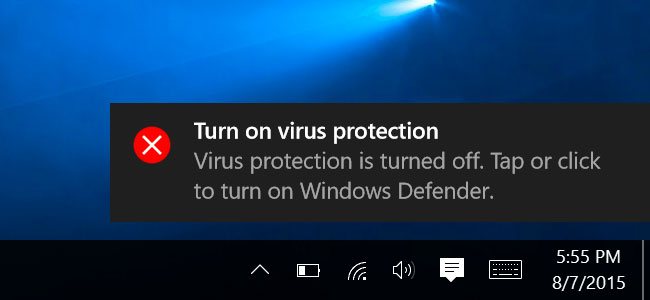 In the Windows 10 operating system installation, it will automatically Windows Defender will be activated. Generally Windows Defender serves as an antivirus or antispyware. But if we use antivirus or antispyware software from third-party companies, such as avast, Avire, AVG etc., then the windows defender is not required.